Step 2:
-
Click on “Services” at the top left. Search for “IAM” and click on the link.
Step 3:
-
On the left hand Dashboard click on the “Users” link.
Step 4:
-
Click on “Add User” button.
Step 5:
-
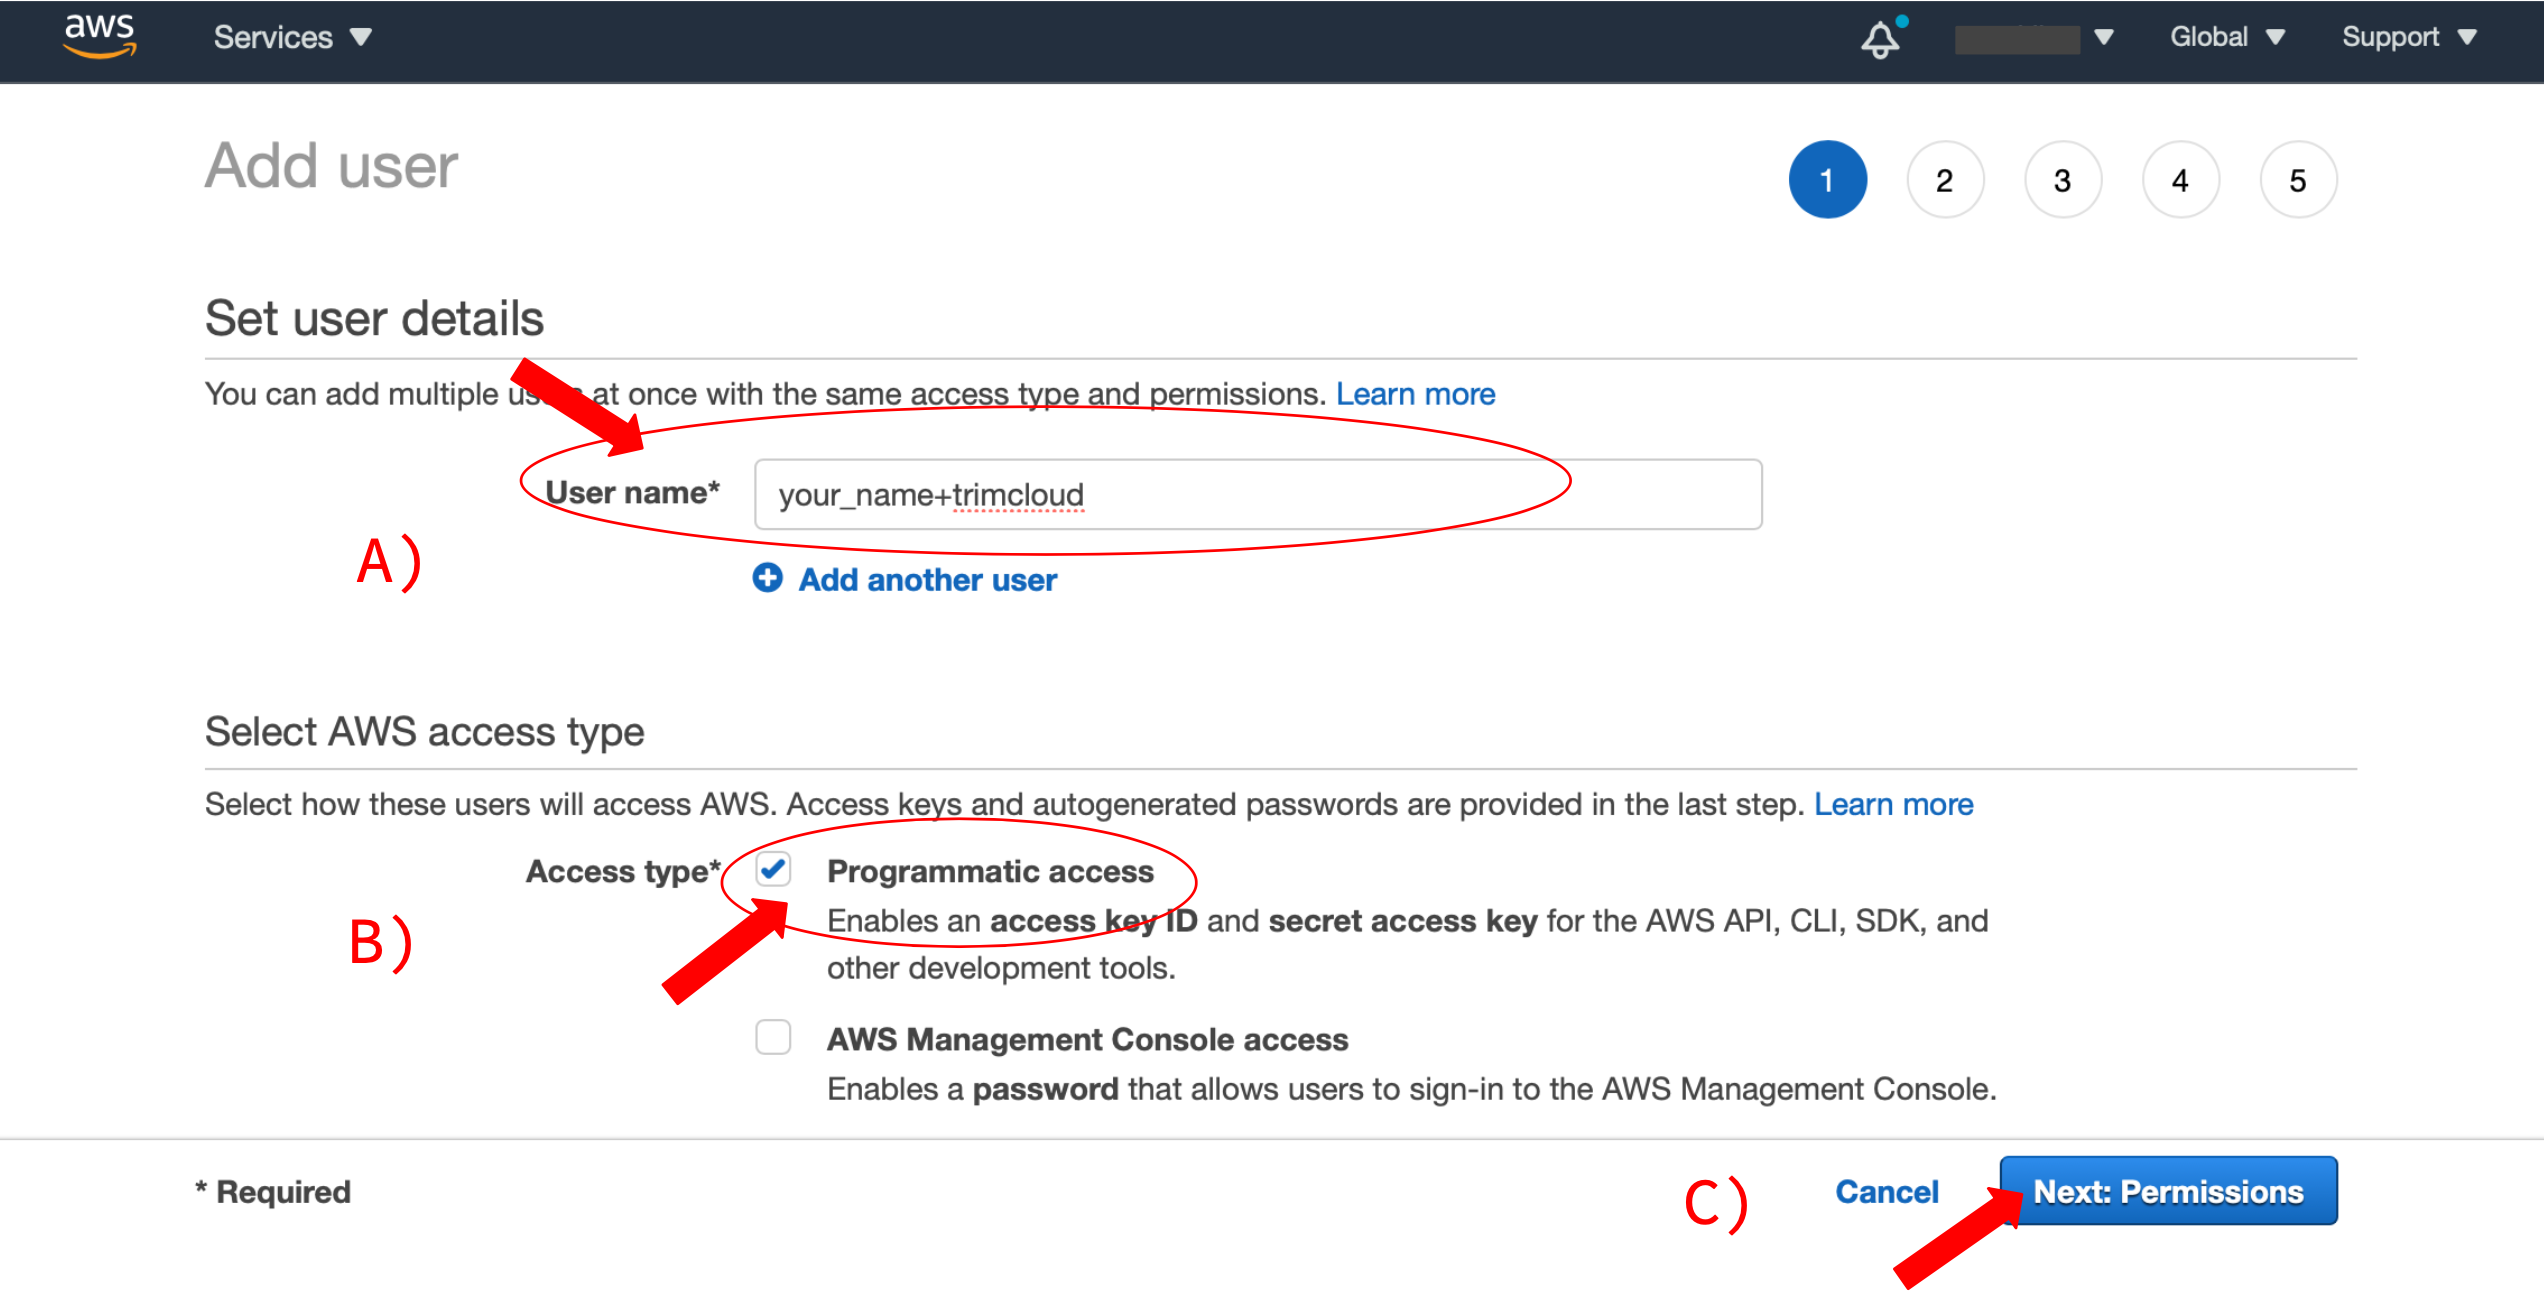
A) Choose a User name. It might be helpful to choose something that reminds you of trimcloud. ex: your_name+trimcloud or company_name+trimcloud.
-
B) Check “Programmatic Access”.
-
C) Click on “Next: Permissions”.
Step 6:
-
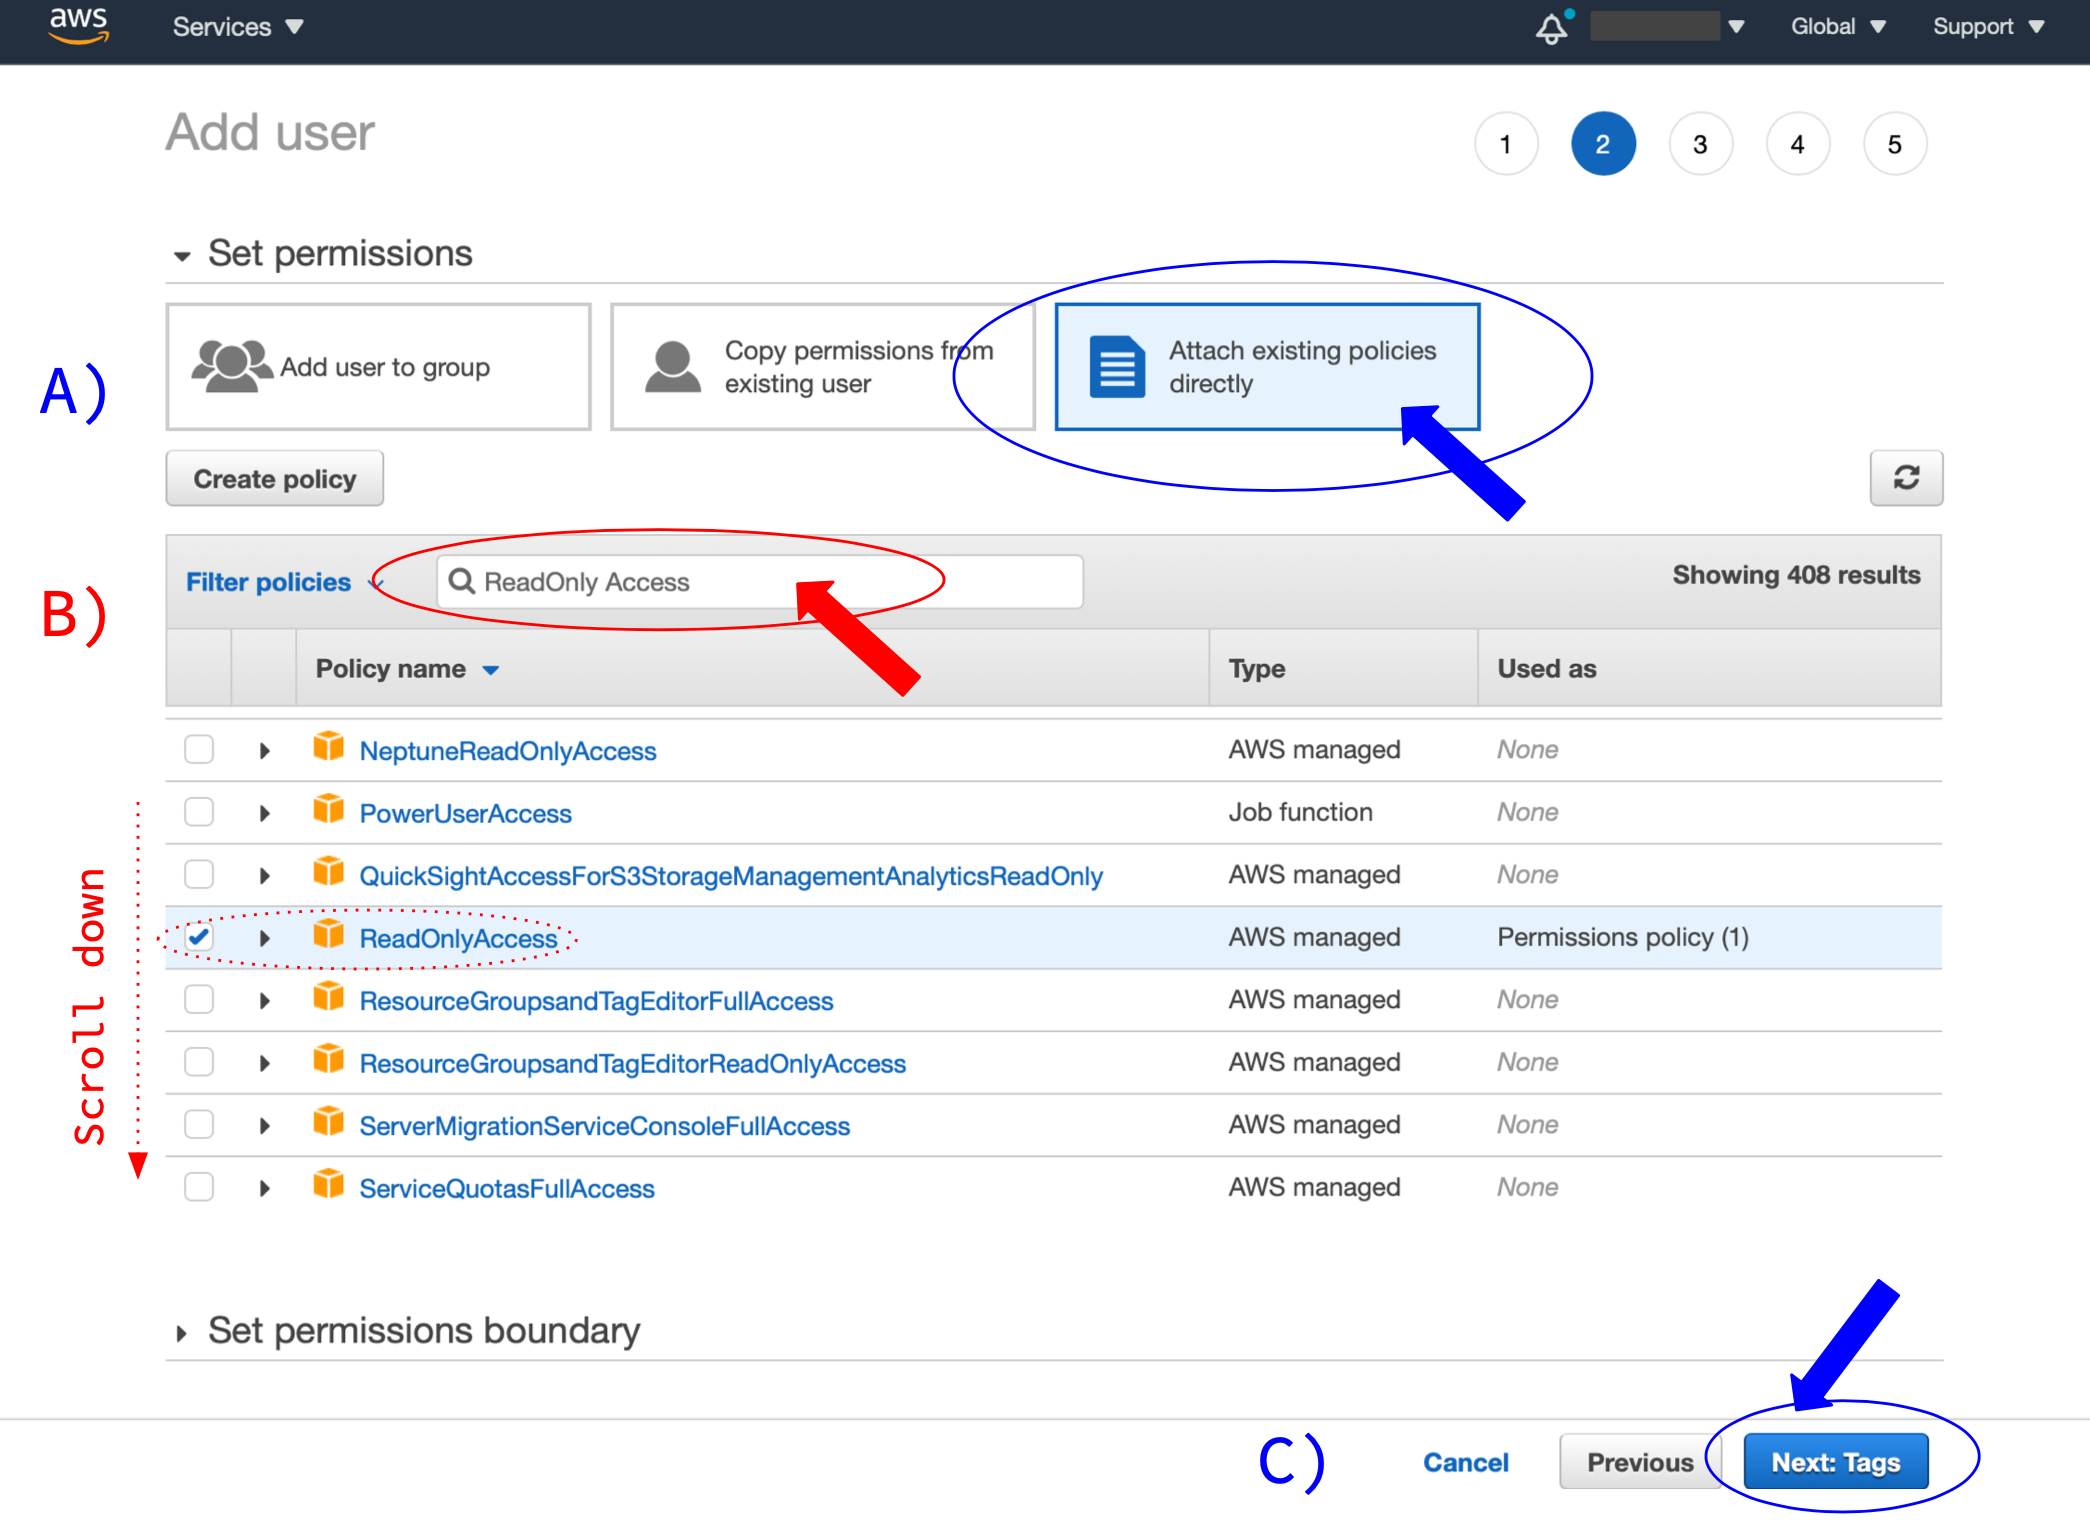
A) Set your permissions. Most users chose the “Attach existing policies directly” option.
-
B) In the search bar, search for “ReadOnlyAccess”. You must scroll down to get to “ReadOnlyAccess”. Select this option.
-
C) Click on “Next:Tags”.
Step 7:
-
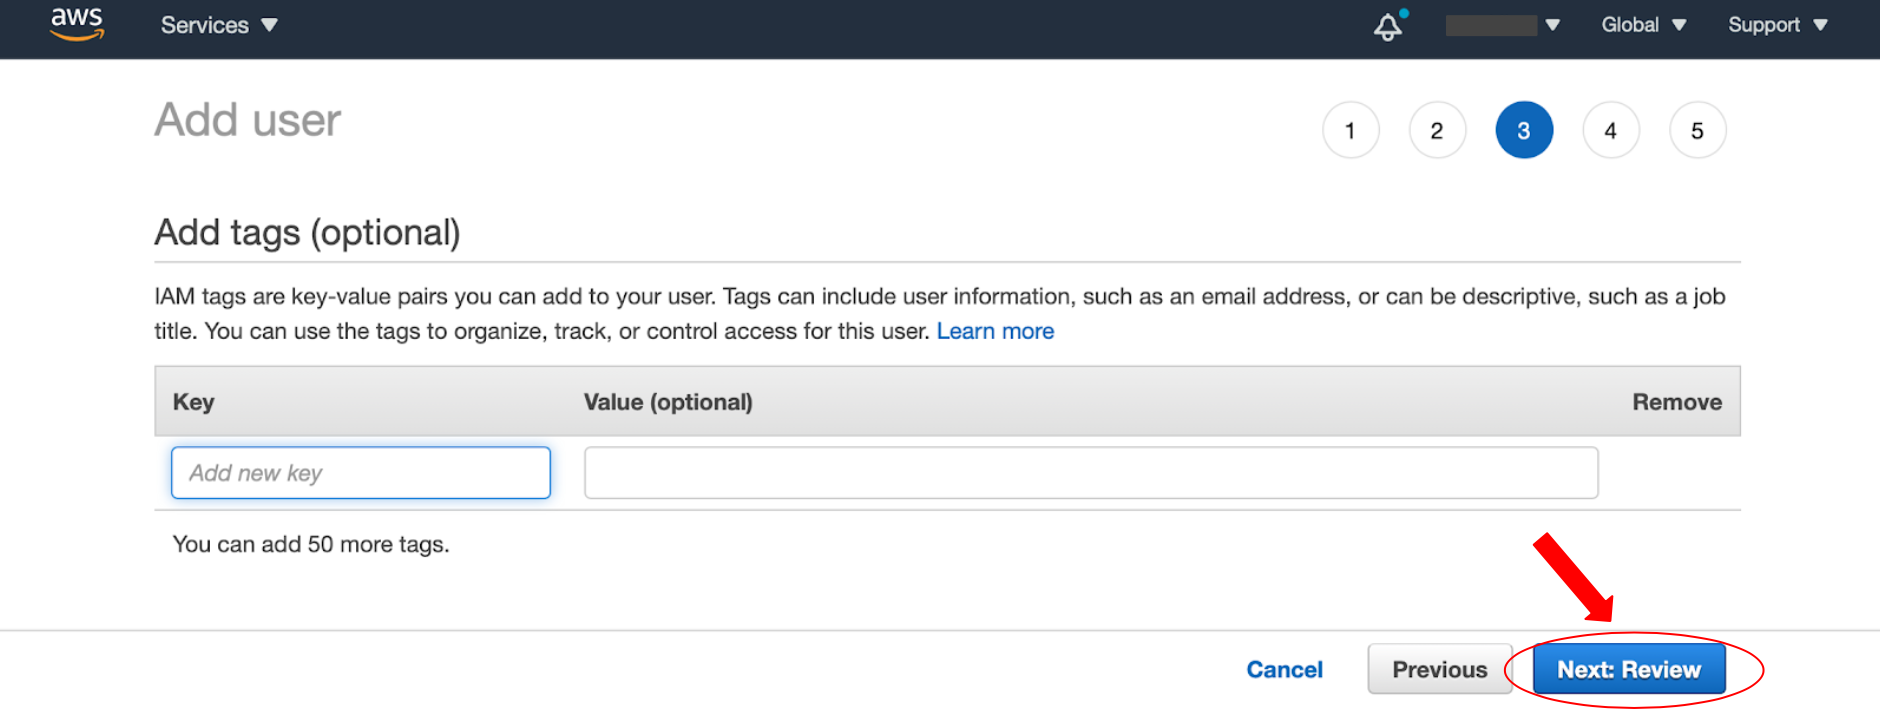
(Optional) Add tags as you see fit. Click on “Next:Review”.
Step 8:
-
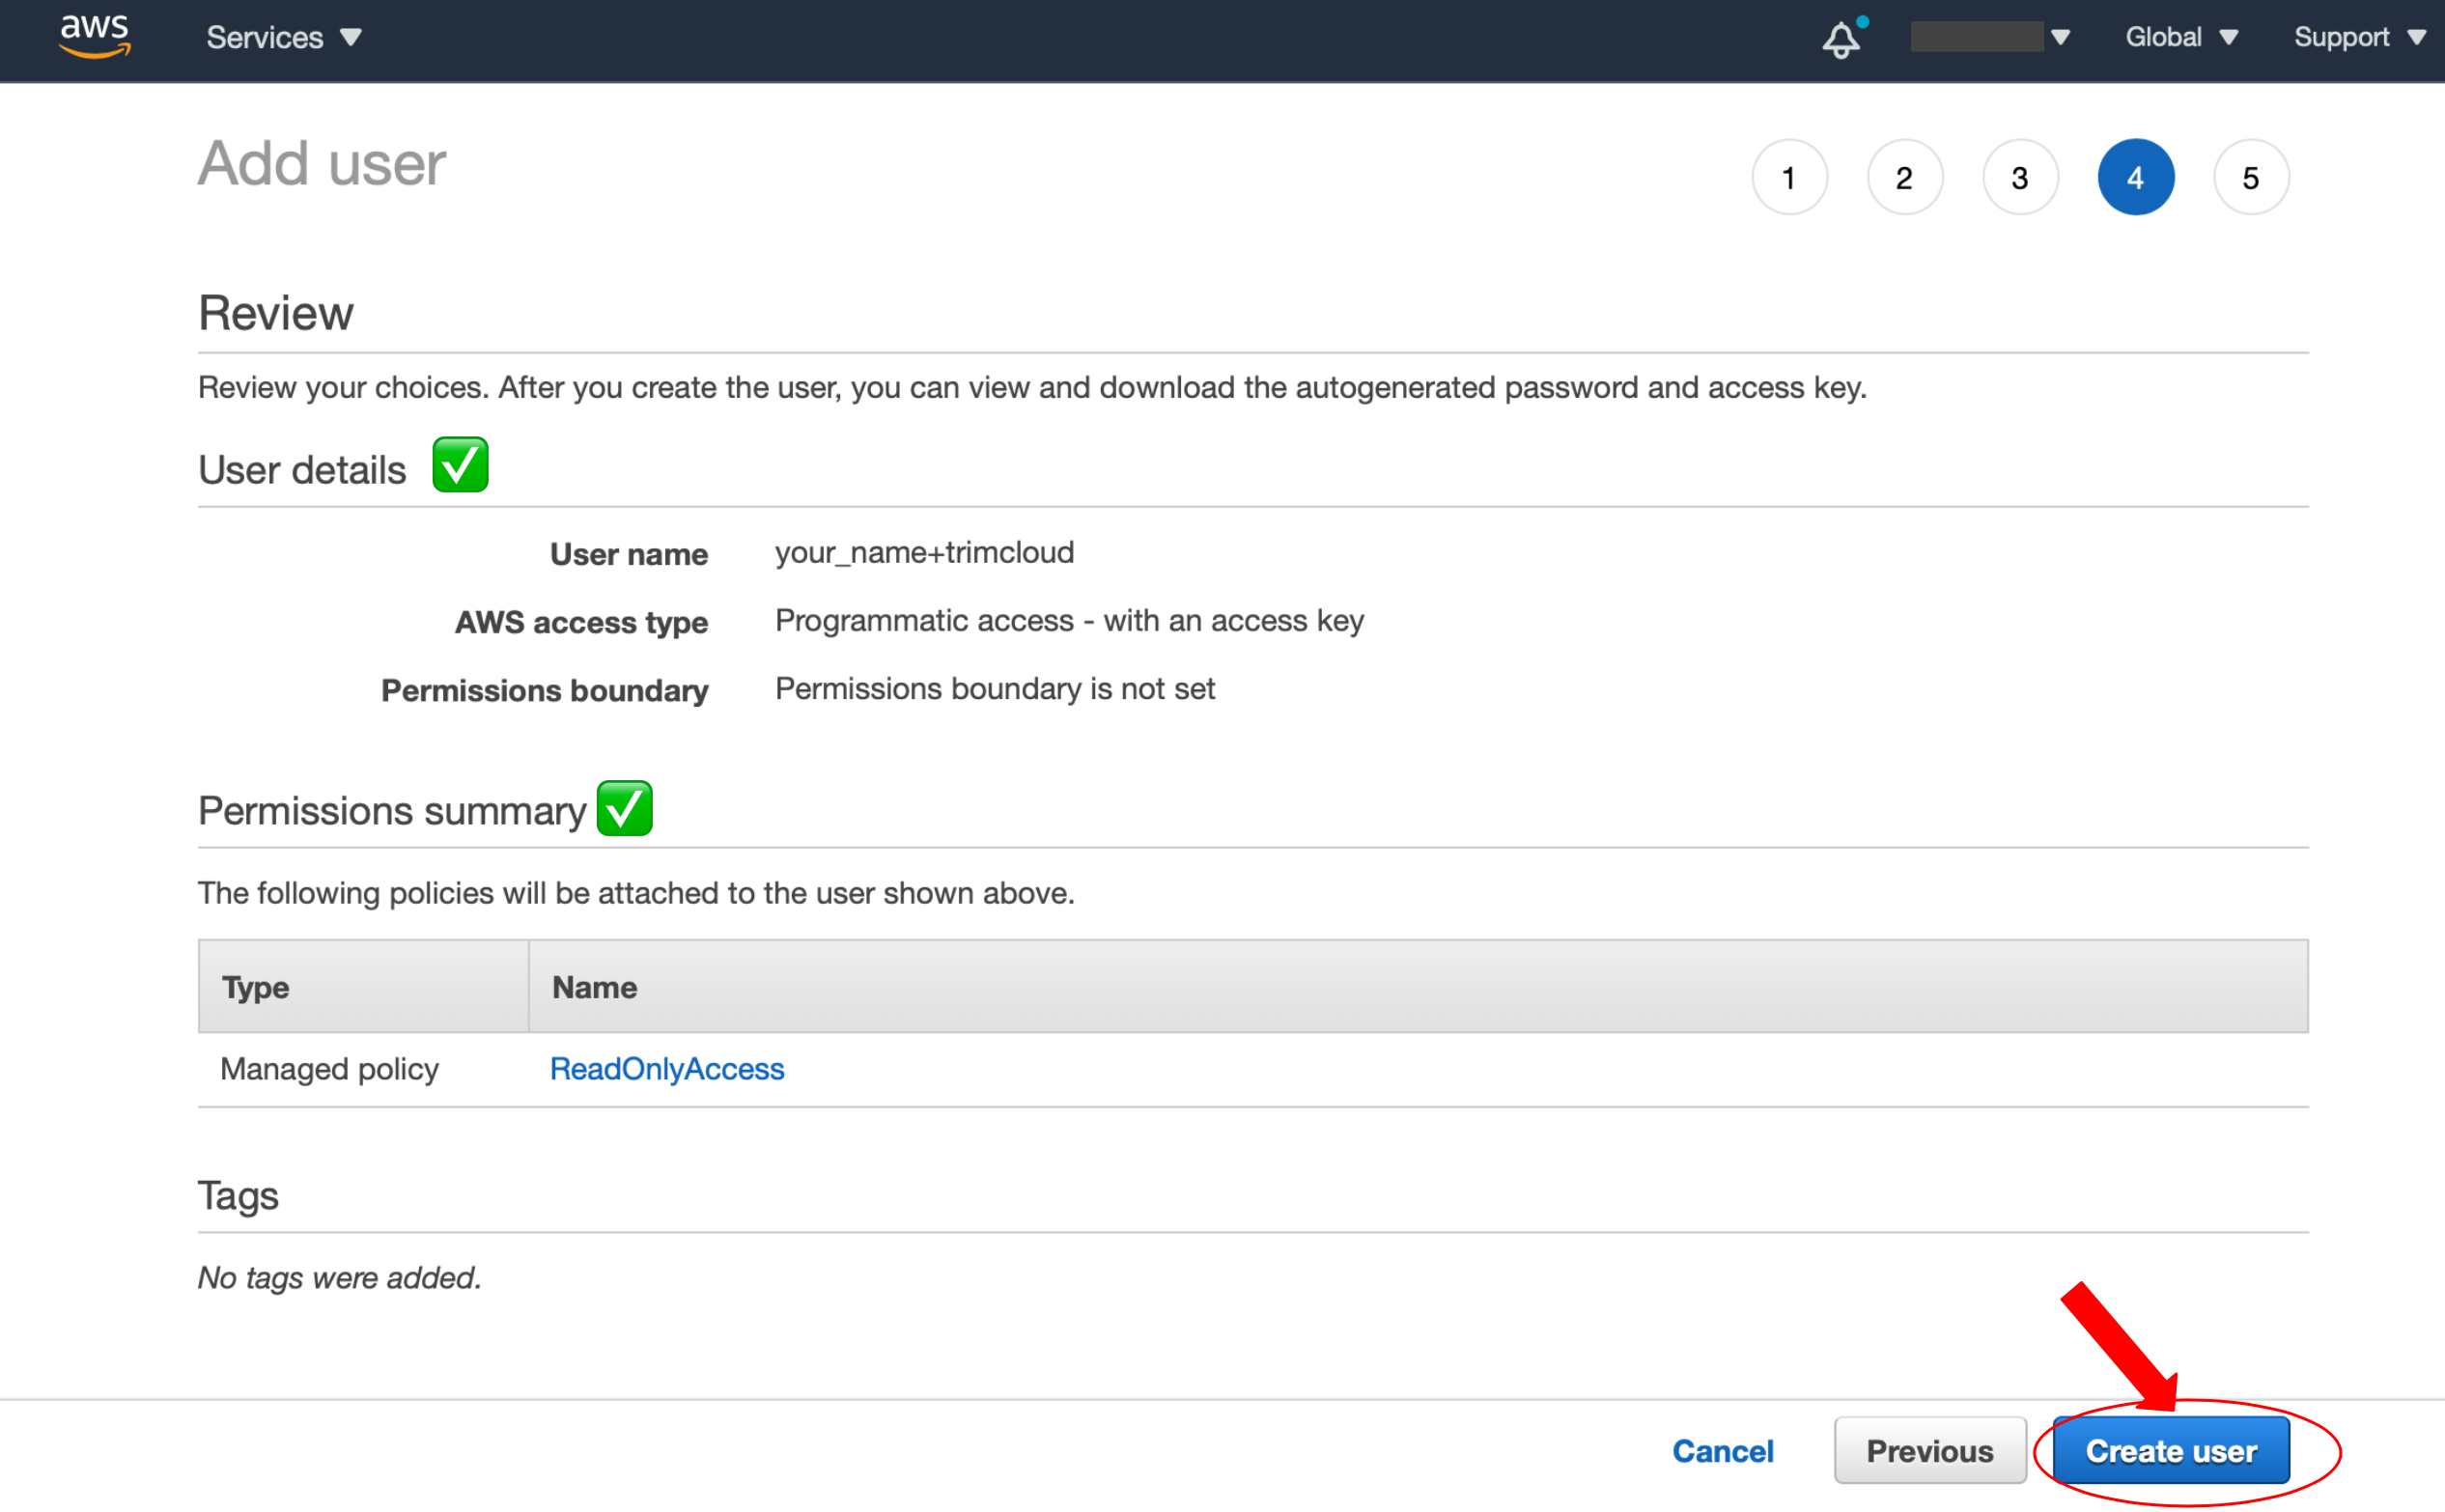
Review your selections and click on “Create User.”
Step 9:
-
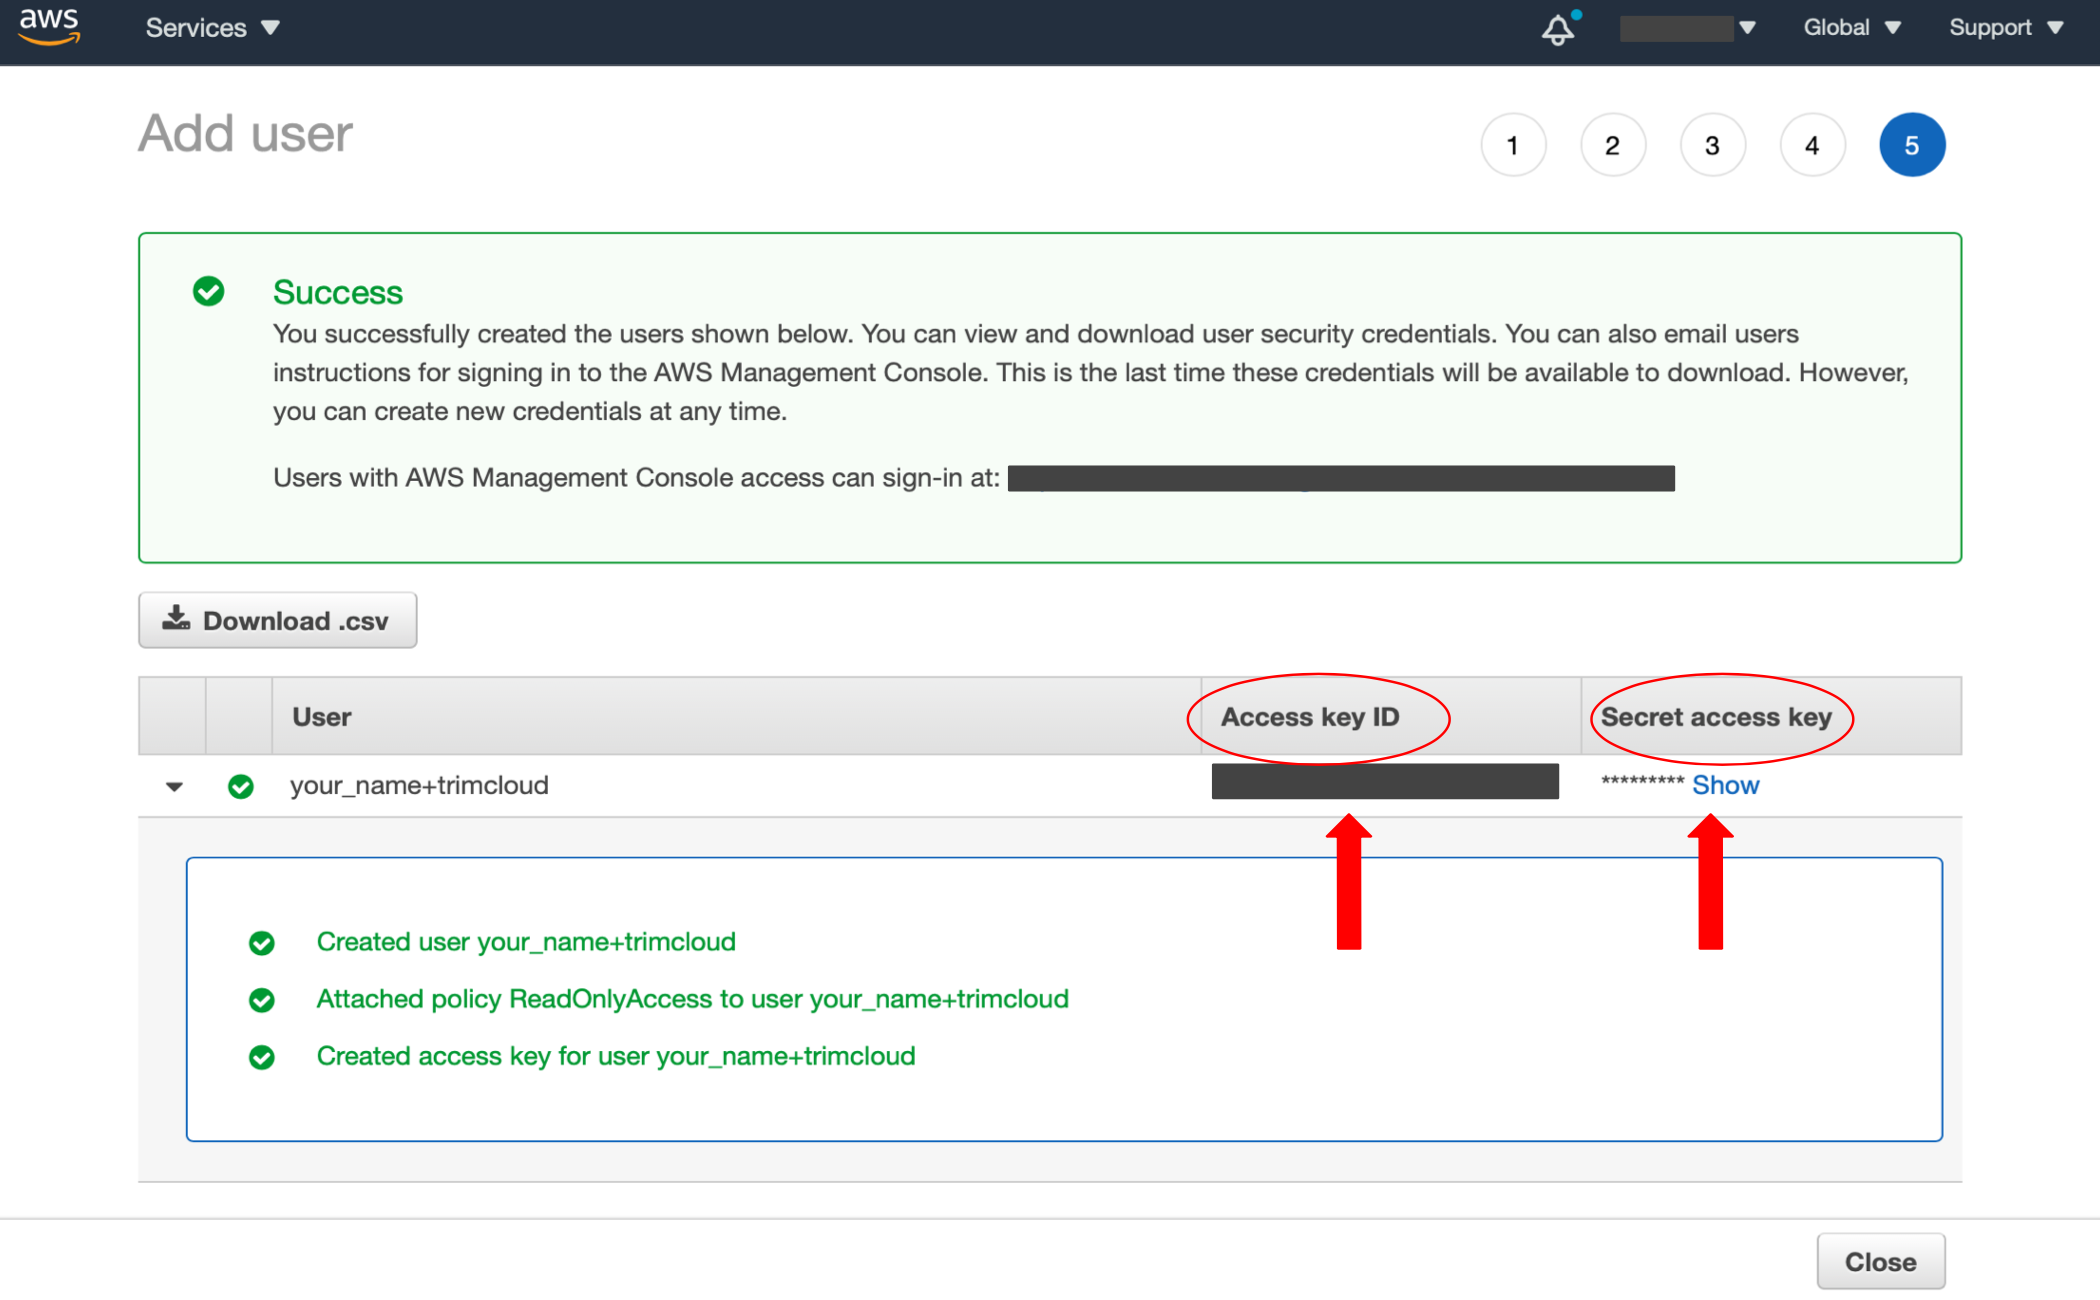
Copy and paste your AWS credentials (key and secret) into trimcloud's Account Set-up form. Note: we recommend doing this immediately after you “Create User”. The secret will not be shown once you leave the page.
Step 10:
-
You can test your AWS credentials here, to check if you generated them properly.


